
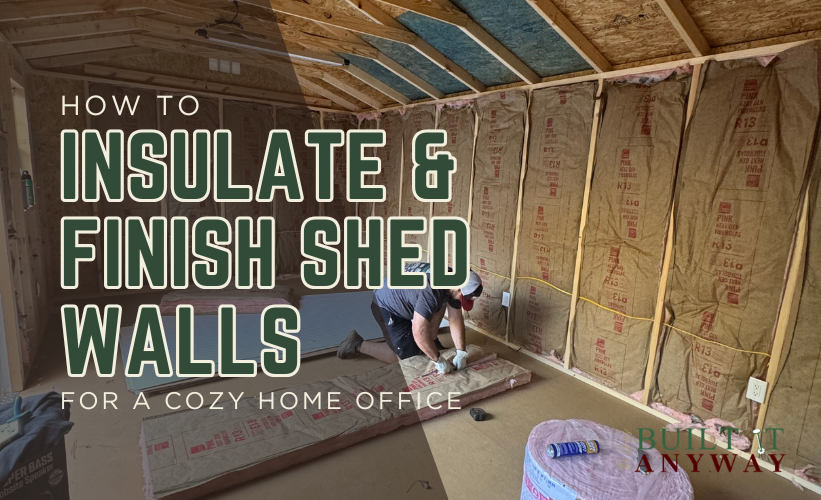
How to Insulate and Finish Shed Walls for a Cozy Home Office
If you’ve been following along on our shed-to-office conversion, at this point in the process you have likely picked out your shed, cleared and prepped the land, and are now getting ready for the conversion process. If there’s one thing for certain, it’s that sheds aren’t built for comfort! It takes a concerted effort to get them there, starting with proper insulation!
If you’re planning to insulate and finish shed walls for a home office, learn from us before you start cutting insulation and hanging drywall. What seems like a simple step in your shed-to-office conversion can quickly turn into a sweaty, itchy, slightly chaotic experience if you don’t plan it right (ask me how I know).
In this post, I’m breaking down exactly how we handled our shed wall insulation and ceiling insulation, why we chose different materials for each, and what we learned along the way. From battling North Carolina heat to figuring out drywall the hard way, this is the real-life, no-fluff guide to making your shed actually comfortable — and not just Pinterest-pretty.
Table of Contents
Why Insulation Matters More Than You Think
When you insulate a shed for a home office, you’re not just adding comfort, you’re making the space actually usable year-round. Without proper shed insulation, your workspace can quickly turn into an oven during the dog days of summer and feel damp or drafty when humidity creeps in. And vice versa during winter. We started our conversion process in late October, and in the evening the temperatures dropped quickly. It was amazing the difference it made when we added the insulation to the walls and ceiling.
Insulation helps regulate temperature, reduce moisture buildup, and improve overall energy efficiency so your heating and cooling efforts aren’t wasted. More importantly, it creates a space you’ll want to work in—because a shed that’s too hot, too cold, or slightly swampy is not exactly going to inspire productivity.
Choosing the Right Insulation for Shed Walls
What We Used for the Walls
While there are several different types of insulation you can use, including foam board and spray foam, we opted for this fiberglass batting. If budget wasn’t a factor, we would have likely gone with a spray foam insulation since it seals better and is more moisture resistant, but we needed an affordable option that we could install ourselves.
The best way to determine which R-value is recommended for your specific built is to consult a chart that breaks it down by zones. We used the Home Depot chart and determined that based on where we live in North Carolina and the type of walls we have, our best option was anywhere from an R-13 and above.
Armed with that information, we went with three (3) rolls of the R-19, and it ended being just a little bit shy of what we needed to cover our entire 12’x20′ shed. So in order to keep the project rolling along, we ended up finishing off with with two (2) packages of the R-13 because our local store didn’t have smaller quantities of the R-19 (and we didn’t have time to order and wait for it to come in. We’re weekend warriors, remember?!).

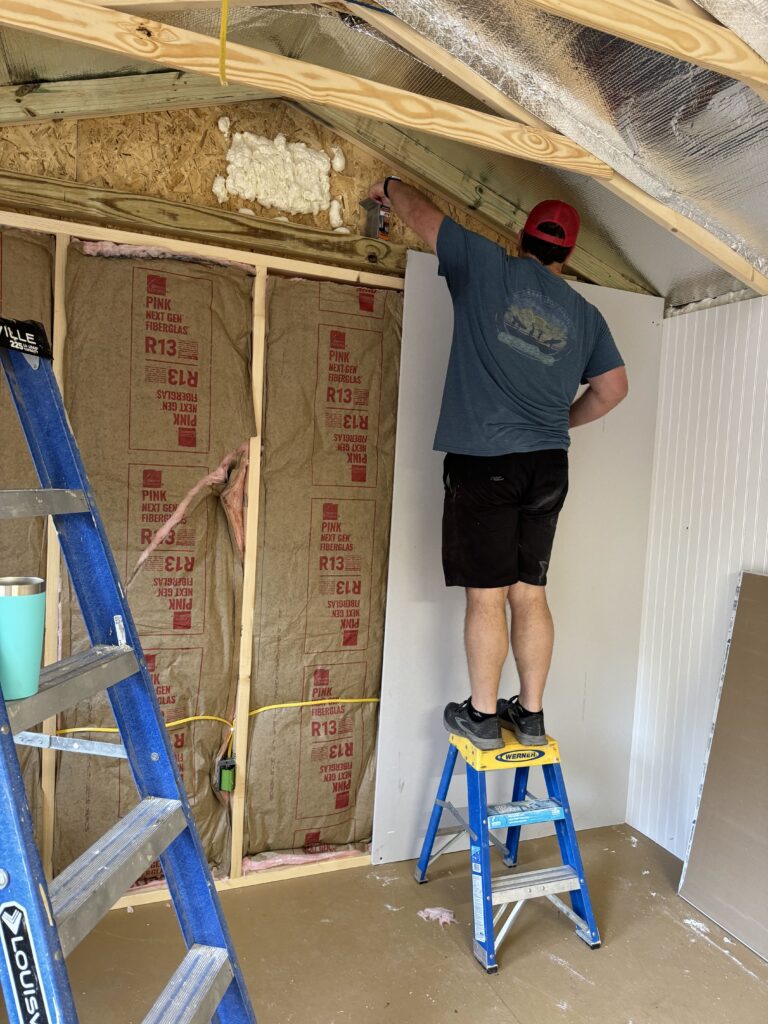
The installation process was pretty simple — all it took was a tape measure, a utility knife, and of course gloves (because no one wants the fiberglass itch, ya know?!). You don’t have to do anything to get the insulation to stick to the walls; you just kind of shove it in there and since it’s “faced,” it’s stiff enough to just stay put for the most part. I should also probably recommend wearing goggles and a long-sleeved shirt for safety purposes. We obviously didn’t do so, as is evidenced by the photo, but you might want to proceed with more caution than we did. Or not; up to you!
Overall I feel like we made a solid decision with our insulation. It was affordable and it was an easy DIY project. We have officially experienced every single season now in our shed office and it has successfully stayed warm in the winter, cool in the summer, and just absolutely perfect in spring and fall.
Ceiling Insulation: Why We Did It Differently
Why Ceiling Insulation Matters More
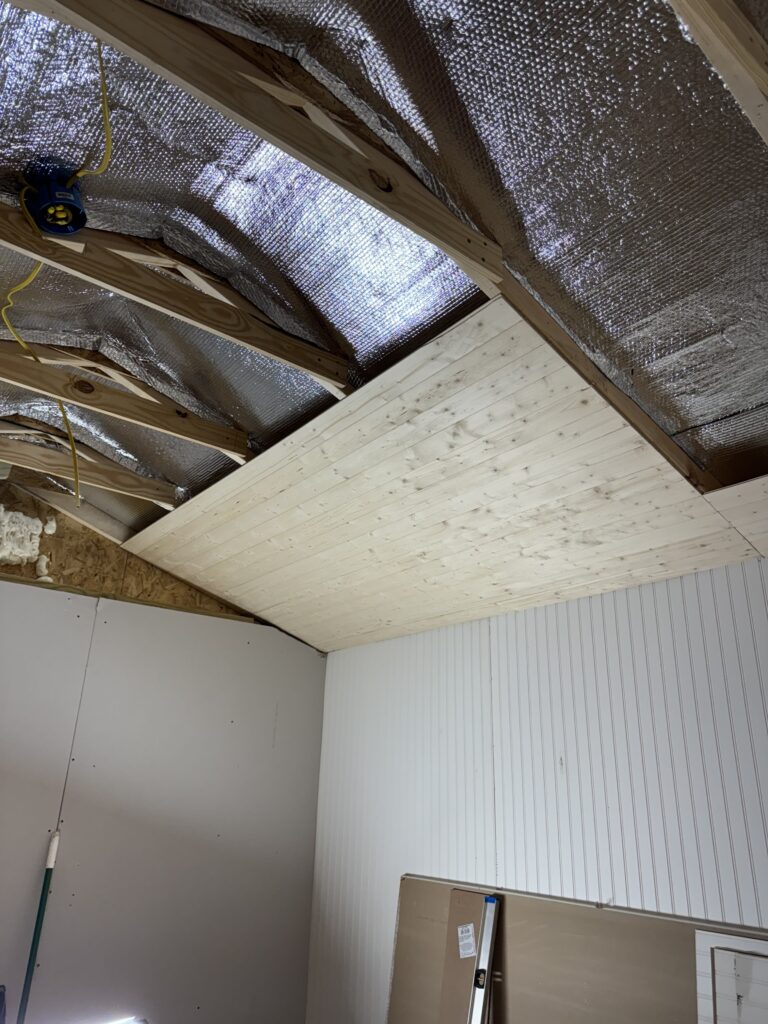
Next comes the ceiling insulation. Don’t skimp on this part because it makes a big impact with temperature control (don’t forget — heat rises!). After doing some research, we decided to go with this double reflective insulation barrier.
This type of product provides an insulating barrier between interior and exterior environments protecting against cold, heat and even UV light and can be used in floors, walls and roofs. We also liked the fact that it’s fiber and irritant free, and was lightweight and flexible for easy installation. All we needed for installation was a staple gun, tape measure, and a utility knife. And again, you might want to throw on some goggles as an extra safety measure.
We originally purchased seven (7) rolls of this insulation and of course it wasn’t quite enough, so back to the store we went. In all it took about eight (8) rolls to complete the job.
Finishing Our Walls: Drywall + Accent Wall Combo
Why We Chose Drywall for Most (but not all) Walls
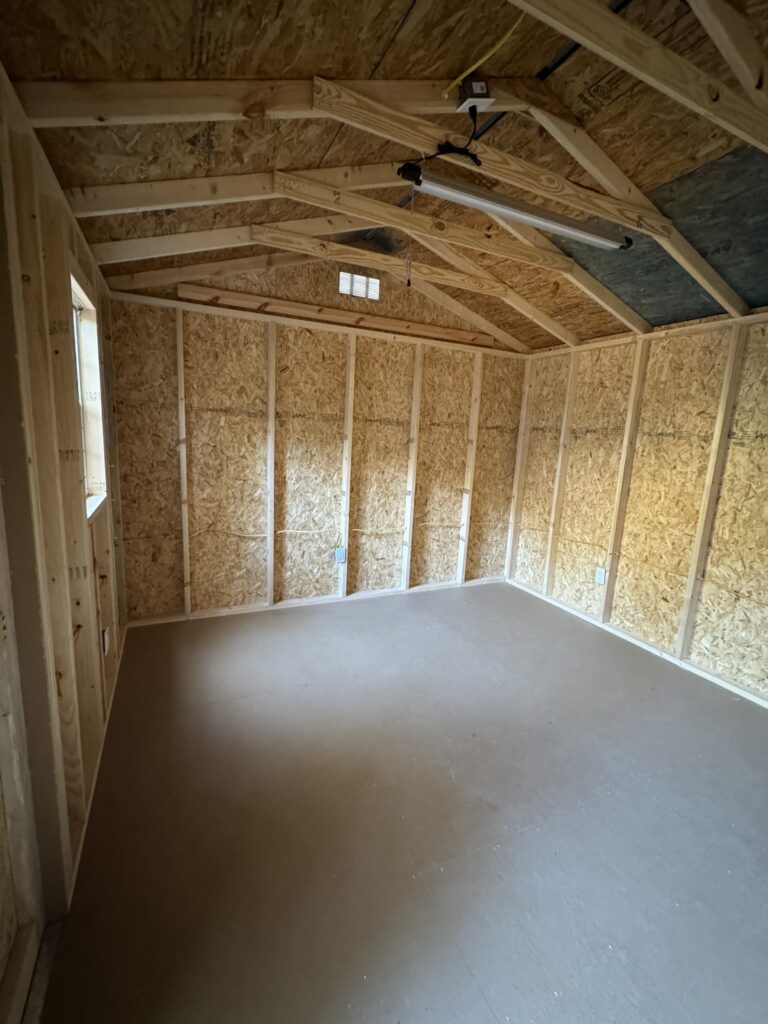
Insulation was pretty straight-forward; it wasn’t terribly expensive and it was easy to install. Finishing the walls, on the other hand…not so easy and straight-forward!
This is where things got a little messy, in more ways than one. We honestly had no clue how we wanted to finish our walls at first. I knew that I wanted something that would be easy ‘enough’ to install, look nice and hold up even better. The only option, in my humble opinion, was drywall. We used a total of nine (9) sheets of this specific one.
Turns out, installing drywall is a bit of an art form. And artists we are not. So how do most well-intentioned DIYers learn in 30 minutes what experts take decades to master? YouTube, of course.
We took our measurements, purchased our materials, and cued up YouTube tutorial #1. And then #2, followed by a couple of others. And with that, we set out to finish our studded walls — or three of them anyway. The accent wall proved to be much easier (more on that later).
What We Learned About Hanging Drywall (Read This Before You Try)
It’s heavier than you think!
No, this isn’t really a big deal, but it’s definitely something to keep in mind. The sheets are also big — like 4′ x 8′ per sheet. So remember this when you’re at the hardware store and trying to figure out how you’re going to get these enormous sheets home when you don’t have a pickup to haul them in.
Fun little side story — our son was in college in Texas (Wreck em’, Tech!) when we started this process and since we didn’t have time to find him a vehicle before he left (that’s another story for another day!), we sent him to college across the country in our Chevrolet Silverado, leaving us in North Carolina with two mid-sized SUVs (one of which was a company vehicle). Neither of which were suitable for hauling much of anything.
Our solution? We rented a small U-Haul truck and tried to purchase as much of the oversized material as possible at that time in order to make it worth the money. Overall it cost us about $130 for the day.
Cutting Drywall Is…An Experience
Actually, cutting the drywall isn’t super difficult — as long as you have the correct measurements. You basically just score it with a box cutter and then with some pressure it breaks apart. Just make sure your measurements are correct so you don’t have a lot of waste. The excess pieces are what you will want to hang onto and use for smaller areas, like above the doors and windows.
According to my husband (and his opinion is the only one that counts since he did all the heavy lifting here!), hanging the drywall wasn’t difficult at all; it’s just screwing the drywall sheets into the studs with drywall screws. Easy peasy.
Mudding & Taping: The True Test of Ability
The difficult part, and the part that I said requires some artistic ability, is the mudding and taping. There are three main takeaways I have for you: 1. Imperfections are normal, so proceed accordingly, 2. Sanding = chaos, and 3. It takes longer than expected.
We began the drywall phase of our shed-to-office conversion in December, which meant temperatures were low and humidity was high. That might not seem like a big deal, but when it comes to taping and mudding drywall, it unfortunately is. The cold, moist air caused a couple of issues that we weren’t prepared for; it created weird bubbles in the tape that didn’t even show up until after it had already dried, and it also took forever for it to dry.
And seeing as how our time allotment for this project consisted only of weekends, it created quite the conundrum.
The other thing that took some practice (and patience) was mastering (and I use that term loosely) the art of actually applying the mud to the taped drywall. Not too much or it takes too long to dry; not too little or the tape peels away from the drywall and leaves weird gaps. It definitely takes practice, but with some patience and the help of a YouTube tutorial or two, you can definitely do it!
And Just For Fun — the Accent Wall!
I mentioned earlier that we used drywall on three of our walls. The fourth wall ended up becoming an accent wall, not because we planned it that way, but because we had an excess of paneling that we weren’t able to use on the ceiling like we had originally planned (more on that in the ceiling/flooring post).
We ordered nine (9) of these panels, but ended up using 4.5 of them for the accent wall. Installing them was as easy as taking a nail gun and nailing them to the studs. So. Much. Easier. Oh, and don’t forget to measure where your outlets will be and cut the holes out for them!
Once everything as painted the same earthy green/brown color, it created a very warm and cosy vibe in our little shed office!

Cost Breakdown
Insulation
- (3) rolls of R-19: $153
- (1) package of R-13: $85
Total: $238
Drywall
- (8) 1/2 in. x 4 ft. x 8 ft. UltraLight Drywall: $120
- (1) bucket USG Sheetrock Brand All Purpose Ready-Mixed Joint Compound: $20
- (1) roll 2 1/16 ” x 250 ‘ Drywall Tape: $3.67
- (1) bucket Everbilt Drywall Screws #6: $22
- (1) Anvil 12″ Finishing Trowel: $17
Total: 182.67
Accent Wall
- (5) sheets 32 sq. ft. 3/16 in. x 48 in. x 96 in. Beadboard White True Bead Panel: $150
Total: $150
Grand Total
Our estimated total (and this numbers will vary), was about $575 to finish the walls of our shed office. This does not include primer or paint, which I will discuss in another blog post.
What We’d Do Differently Next Time
Do we have any regrets? Not really. Are there things we would do differently should we ever have to do it again? Probably so.
One of the main things that would have resulted in a cleaner and better looking finish would be performing the work in the warmer months, so the drywall could have dried better and the tape would not have bubbled. While it did’t technically impact the integrity of the drywall, it did affect the overall look, which is something to keep in mind, especially if you’re prone to nitpicking your own work like I am.
Another issue we ran into was not knowing how to cut the drywall sheets to fit in the ends of the shed where the angles were not straight across, but were at more of a rhombus shape. We should have used the sheet going longways and cut around the door rather than piecing together lots of small pieces in a vertical manner.
And lastly, we would have practiced taping and mudding on a practice sheet before we started in on the actual walls in order to better perfect our method.
Overall though, we were very pleased with the way the walls turned out and would definitely recommend going with drywall (and an accent wall if you’re feeling fancy) in your shed office conversion.