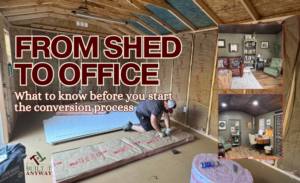
Our backyard shed to home office conversion started in 2024 with a simple problem: We were two remote workers who needed a workspace, and our new house didn’t have one. Hi, I’m Staci—a digital marketer by day and a DIY enthusiast mostly by necessity. I’m also the proud co-captain of Team “We’ll Figure It Out.” This blog is for real people tackling DIY projects on real budgets. My husband and I take on projects to save money… and occasionally to test the strength of our marriage. Follow along as we turn an ordinary backyard shed into a home office, documenting the triumphs, missteps, and our increasingly strong opinions about drywall.
Table of Contents
Why We Needed a Backyard Home Office
In the summer of 2024, my husband, teenage daughter, and I packed up our 4,000-square-foot house (complete with the most perfect home office) and moved from the dusty plains of West Texas to a 2,300-square-foot house in the Piedmont area of North Carolina—with one small problem: no home office.
I work from home and have done so since long before the pandemic made it commonplace. And trust me when I say, I have worked in all sorts of “less than ideal” situations, including at dining room tables, on TV trays, in coffee shops, and sprawled out on my couch as my toddler ran amuck nearby. The problem is, I got spoiled by finally having a completely separate home office. There was no going back for me.
And to make matters…let’s say “more pressing,” my husband also took a job in which he worked remotely, which meant two of us were now needing a home office space, of which we had none!
We initially decided to use our formal dining room as a home office but it didn’t take us long to realize that not having doors to close or cabinets for our supplies just made for utter chaos. And clutter. Neither of which I handle well.
Our budget didn’t allow for an addition, and we knew we didn’t want to lose the spare bedroom because we love having company stay with us, so we decided to think outside the box — and our house. Rather than looking inside, we turned out attention outside — to the backyard.
Why We Chose a Shed/Office Conversion
We kept driving past a local business that sells portable storage buildings and one day it struck us — that would make a perfect home office!
Our thought process went something like this: A. It would be far less expensive than adding a room onto our house, B. It would also be quicker than a home addition because the building itself was already assembled, and C. Plopping it in our backyard would allow us to have a little office tucked into the woods, which is just as dreamy as it sounds. Plus, it would allow us to hone our DIY skills and create something that would be perfectly suited to our needs and our style.
Essentially, converting a backyard shed into a home office turned out to be the most practical solution, so our decision was made.
Our Plan for the Shed-to-Office Conversion
Once our vision started to take shape, it was time to act. In the coming blog posts, I’ll break down step-by-step what we did, why we did it, how much it all costs, and I’ll even share the mistakes we made along the way so you don’t have to!
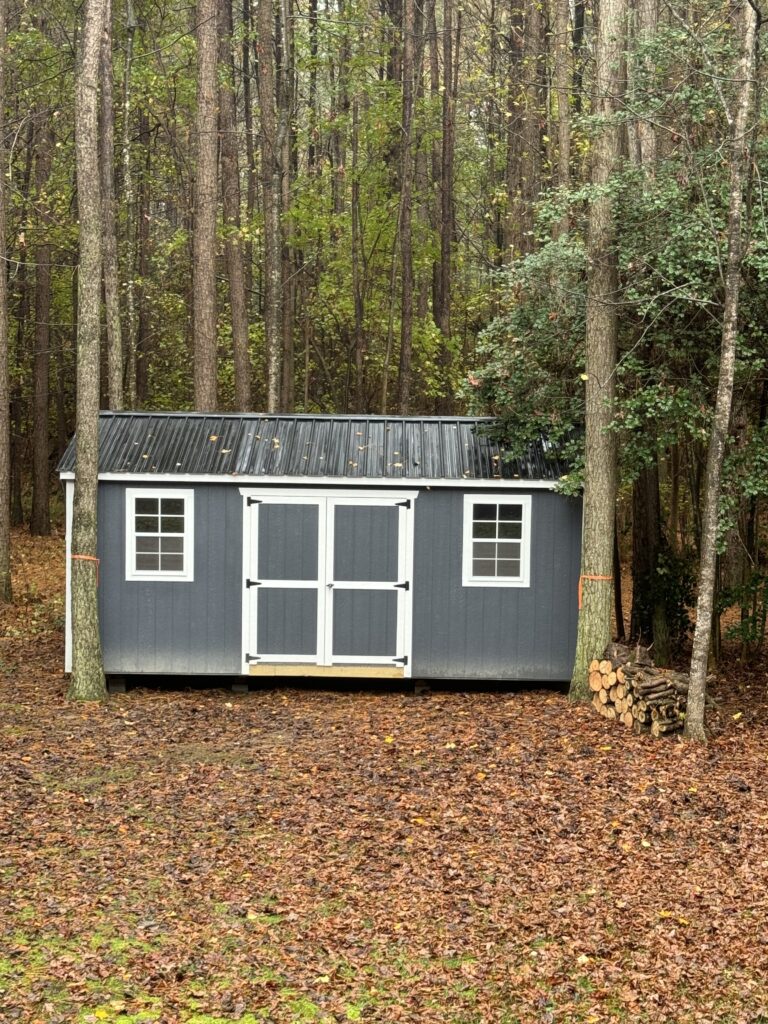
Step 1 – Selecting the Right Shed
Not all storage sheds are created equal. We knew we wanted something that would be large enough to accommodate the both of us, sturdy enough to withstand North Carolina weather events, and cute enough that I didn’t mind seeing it every time I looked out my kitchen and living room windows. We also knew we didn’t want to spend a fortune on shipping.
I’ll break down the type of structure we selected and give you a rundown of the cost to purchase and the delivery fees.
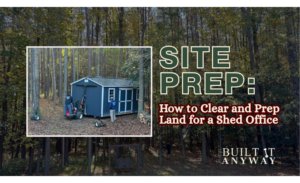
Step 2 – Preparing the Land
This part was a little trickier than we anticipated it being. The reason why? As I mentioned earlier, my husband and I were both born and raised in the desert, which is why the thought of cutting down a single tree in our little forested backyard physically made me ill. I wanted an office in the woods but I didn’t want to eliminate any trees to make room for it.
Obviously that wasn’t possible. I’ll break down how we decided where to place the shed office, what we had to do to make room for it, and how the delivery guys were able to squeeze it into place with the precision of a brain surgeon!
Step 3 – Preparing the Shed For Conversion
Once the shed was in place, it was time to convert. In this post I’ll break down the power, outlets, and lighting situation. Since neither of us are certified electricians, and since I had no desire to watch my husband start a fire or even worse, inadvertently electrocute himself, we decided to call in the experts. Spoiler alert — the most difficult part was getting a certified electrician to actually show up. Seriously, it’s like no one wants to work anymore!
But having electricity is a non-negotiable, so other than purchasing the shed, this step was the most expensive part of the process, but something we couldn’t skimp on. We did find ways to save money though, so I’ll share those tips with you as well!
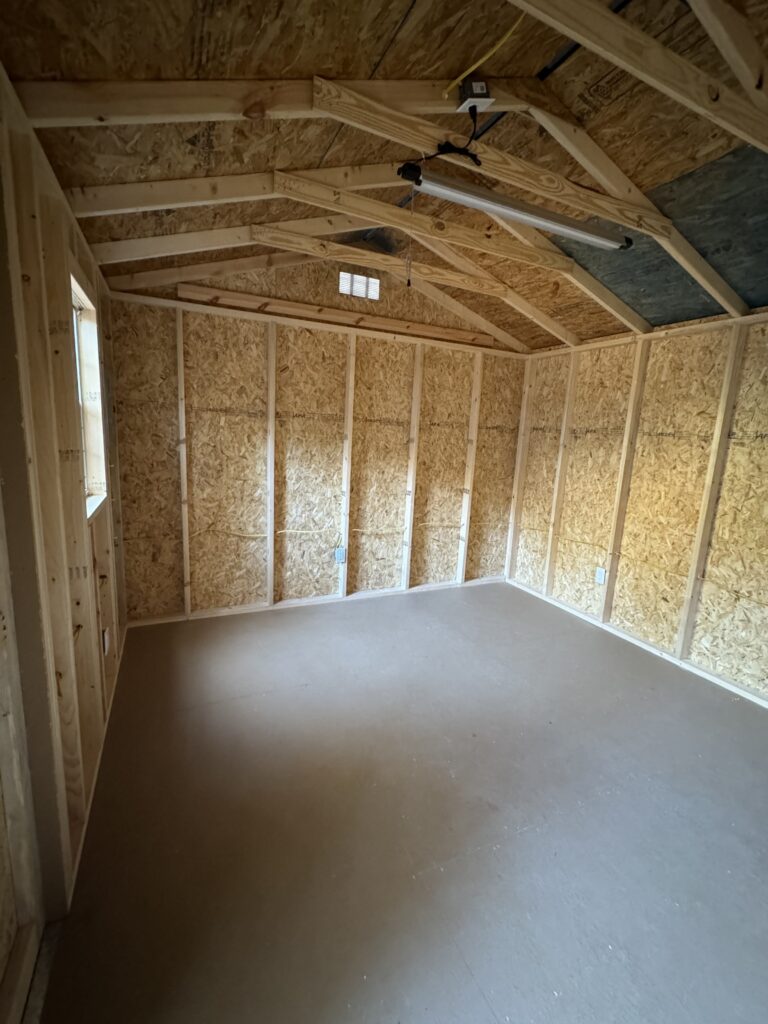
Step 4 – Insulation and Walls
In order for our backyard shed office to function like we need it to, it had be properly insulated and the walls needed to be fished – which meant no bare 2x4s. We ended up using a couple of different products for the walls, including paneling and drywall, and I’ll break down the reason for that in this post. This was a part of the DIY process that took some time and patience and a lot of Youtube tutorials.
We came to realize after countless hours of installing drywall that it is, in fact, an art form. We are not, it turns out, artists in that medium! But we made it work and you can too! I’ll show you how.
Step 5 – Ceiling and Flooring
Once the electrical work was done and the insulation and walls were in place, it was time to focus on the floor and ceiling. In this blog post I’ll talk about the type of flooring we ultimately went with and how it has held up so far.
I’ll also tell you about our original plan for the ceiling and show you the disaster that ensued, before landing on perfect material. I’ll share a cost breakdown, the materials we used, and a couple of things that I would have done differently knowing what I know now.
Step 6 – Installing the Split Unit A/C and Heater
Living in North Carolina, it goes without saying that converting a shed into an office wouldn’t even be a thought if heating and air conditioning wasn’t an option. This was never more clear than during the brutally cold winter months when we were forced to work on said projects with no heat. It was miserable. There were so many days and nights that we would work in freezing temperatures, pausing to warm our hands and feet with the pathetic little space heaters that did little more than trip breakers if we tried to run them at the same time we were running the circular saw.
We did the bulk of the manual labor for our shed office conversion during the fall and winter months, but by the time we got to the point of selecting and installing the split unit, it was time for air conditioning. We ended up choosing a MRCOOL mini split, and I’ll tell you why we selected the the split unit, how we installed it, and I’ll even share some troubleshooting we had to do in order to get it to function like it should.
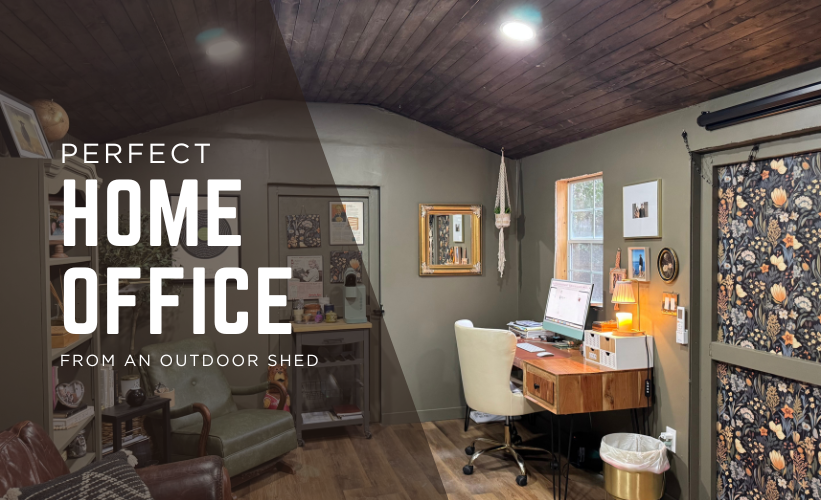
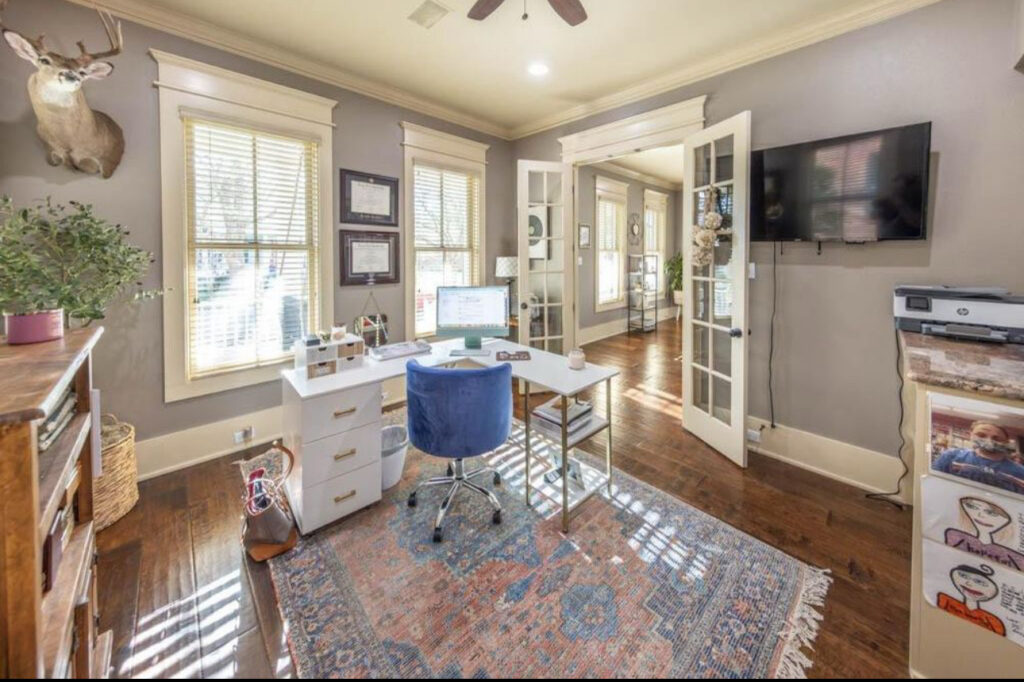
Step 7 – Designing the Office Interior
Now it’s time for the fun stuff! In this blog post I’ll tell you all about the paint we used, the furniture we selected, how we set up the furniture, how we got internet to the office, and the lighting situation. Some of the stuff came later down the road, like when I added a peel-and-stick wallpaper to the doors for a pop of color. I am big on thrifting, so I’ll even show you every single thing in the shed office that was thrifted and/or repurposed. Spoiler alert — it was almost everything (we’re on a budget, remember!) .
Step 8 – Building the Deck
And finally, we’ll move to the exterior of the shed office. We knew we wanted a deck off the front, but we also knew that was not going to be cheap. Since we’re DIYing on a budget, the deck was something that we saved for and came along much later in the process. I’ll break down the size we opted for, the materials and tools we used, and what I wish we would have done differently.
What You’ll Learn From This DIY Project Series
This blog series will document the entire shed office conversion process—from the first questionable measurements to the moment we finally sit down in a functional workspace.
Here’s what I hope you will gain from this blog series:
- Mistakes to avoid
- Tools you actually need
- Budget breakdowns
- Beginner-friendly DIY tips
Our DIY Philosophy (The “Built It Anyway” Mindset)
Like we have always told our children, the best way to learn something is by doing it! Of course you need to study and read and watch and take notes, but you’ll learn the most by just doing it; getting your hands dirty and doing the damn thing!
We have also always believed that mistakes are A. going to happen, B. Not the end of the world, and C. Great learning opportunities. A friend once told me that she doesn’t fail, she learns and adjusts. And that’s our mentality at Built It Anyway — we know we’re not professionals, we’re just a couple of average Joes that like to DIY on a budget.
Follow Along With Our Shed Office Build
If you’ve ever looked at a backyard shed and wondered if it could become something more, you’re in the right place.
I hope you’ll follow along with this series and maybe even bookmark this blog. My goal is for this to be a great reference place for our fellow DIY enthusiasts who are rolling on a budget. We would also appreciate it very much if you would share our blog with your fellow DIYers, especially anyone looking to convert a shed into a home office.
FAQ About Shed Office Conversions
Can you convert a shed into a home office?
Yes, many sheds can be converted with insulation, electrical, and proper flooring.
Is a backyard office cheaper than a home addition?
In most cases, yes. Shed conversions are often thousands of dollars cheaper than building an addition.
Do I need to hire a professional contractor to covert a shed into a home office?
No. With the right tools and knowledge, you can absolutely do it yourself. In most cases, yes.